How to configure Cisco Router/Switch for SNMP through CCP
Following lab explains how to configure Cisco Router/Switch for SNMP through CCP (Cisco Configuration Professional).
Open CCP (Cisco Configuration Professional) and connect to the Router which you want to configure SNMP related settings.
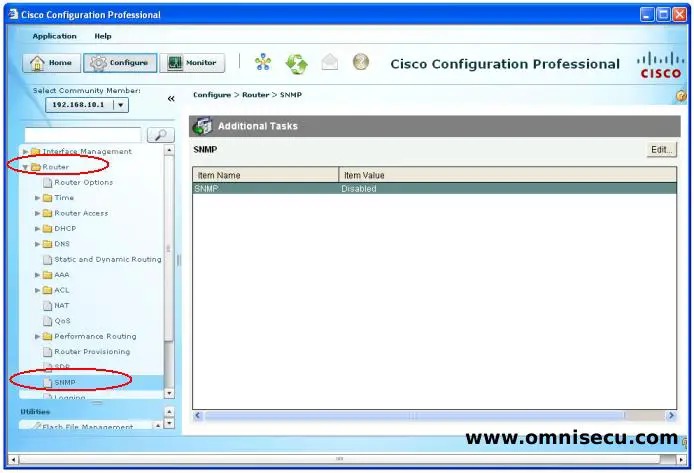
Step 1 : Click "Router" and then click "SNMP" as shown below.
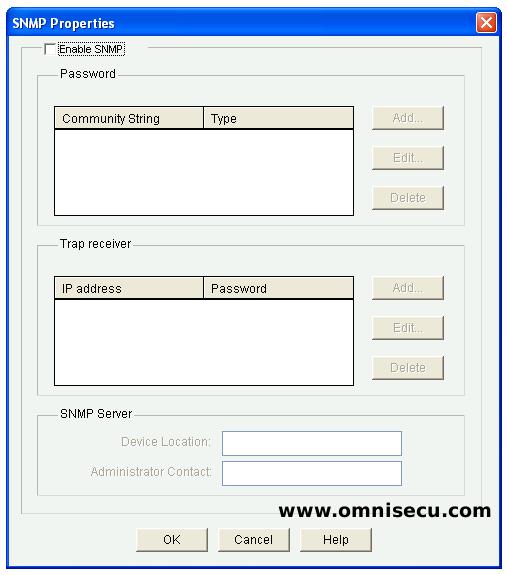
Step 2 : Click "Edit" button to change the default SNMP related settings. A dialog-box window will pop-up as shown below. You can configure/edit SNMP related settings of your Cisco Router / Switch in this window.
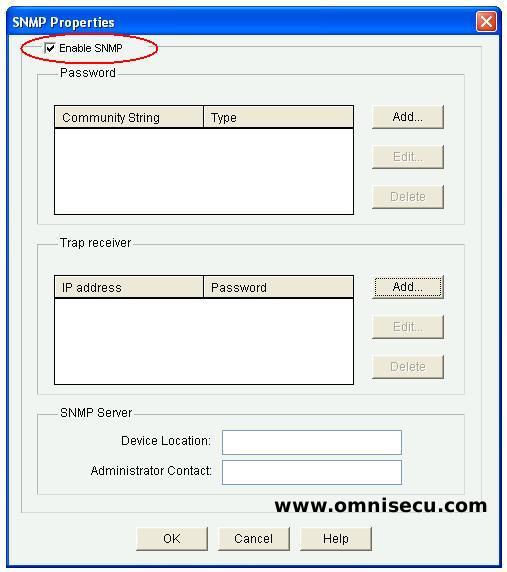
Step 3 - Check "Enable SNMP" checkbox to enable the Cisco Router/Switch as an SNMP Client, as shown below.
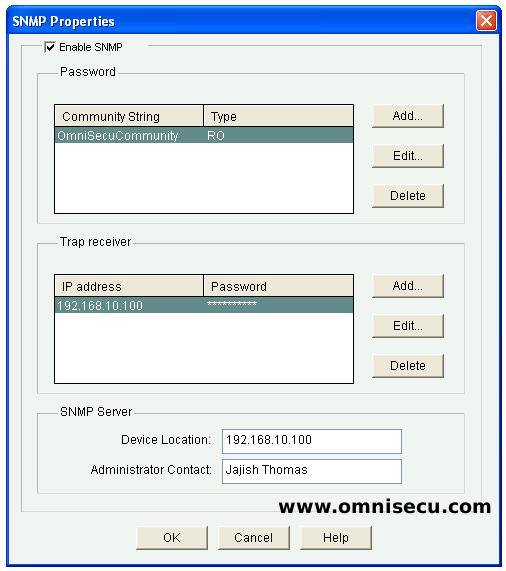
In "Password" pane, we can configure the SNMP Community String and Type (Read-Only or Read-Write). In "Trap receiver" pane, we can configure the Trap related settings. In "SNMP Server" pane, we can configure the SNMP Server IP address and Administrator details.
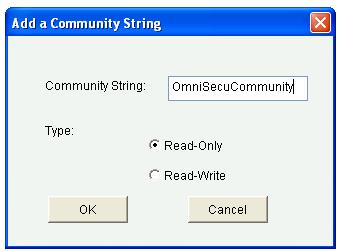
Step 4 - In "Password" pane, click "Add". Enter the SNMP community string (OmniSecuCommunity), and Type (Read-Only or Read-Write) and click "OK".
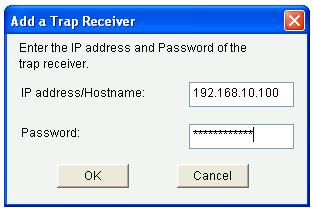
Step 5 - In "Trap receiver" pane, click "Add". Enter the IP address and Password for the SNMP Trap receiver. Click "OK".
Step 6 - The "SNMP Properties" window is now filled with the previous input. Click "OK".
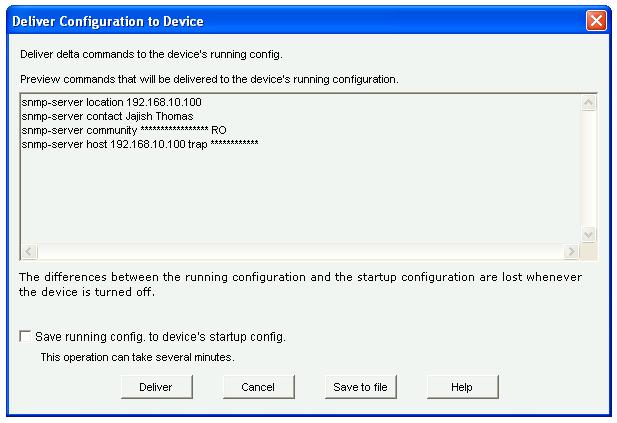
Step 7 - Click "Deliver" to deliver the commands to Cisco Router, OmniSecuR1.