How to configure Disk Quota
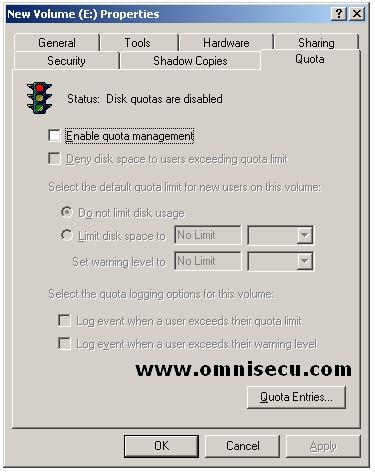
You can configure disk quotas through the NTFS volume Properties dialog box. To open NTFS volume Properties dialog right click the volume drive letter select “Properties” from the context menu. In the volume Properties dialog box, click the Quota tab to configure Disk Quotas. By default, Disk Quotas are disabled. The "Quota" tab is shown below.
Option |
Description |
Enable Quota Management |
Enable or Disable Quotas |
Deny Disk Space To Users |
Specifies that the users who exceed their disk quota will not be able store more files. |
Select The Default Quota |
Allows you to define quota limits for new users. We can set no limitation in using disk space, limiting disk space, and also to set warning levels. |
Select The Quota Logging |
This allows logging options when users exceed quota limits or users exceed warning limits. |
By default, quota settings we configured in the Quota tab will apply to all users for whom a quota entry does not exist. In the Quota tab you can configure a default limit which will apply to as many users as possible. You can also create individual Quota entries also. You can also create a warning level, to inform the user, which will be lower than the Quota limit.
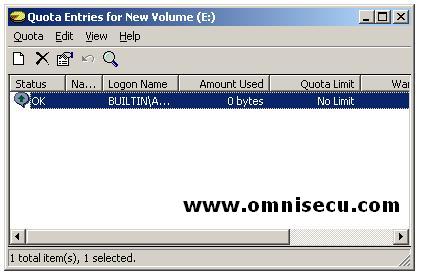
You can also set disk quotas for individual users. This is very useful if you want to allow a specific user to use more storage space, or if you want to further restrict a user from using more storage space. To set disk quota for an individual user, click the Quota Entries button in the Quota tab.