How to change the Row height in Excel worksheet
If you are new to spreadsheet concepts like Row, Column and Cell, please visit following link to learn the terms Row, Column and Cell in Excel worksheet before reading the tutorial lesson.
If the default font in your copy of Excel is Calibri and font size is 11, then the default Row height for all the rows in all new worksheets of Excel workbooks is 15 Points (20 Pixels). If you change the default font type or size, the default Row height also will change in new worksheets.
Following are the values related with Row height in Excel 2019.
| Minimum | Maximum | Default |
|---|---|---|
| 0 (For hidden Row) | 409 | 15 (for default font Calibri, Size 11) |
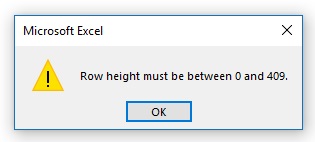
If you try to increase the Row height beyond 409, Excel will show below dialog box.
Once you start editing the Excel worksheet, the Row height will change according to the largest font a Cell can accommodate in a Row. You can verify it by selecting a Row and then by increasing the font size from Excel Ribbon. As you increase the font size, the Row height also will increase.
If you have different font sizes in an Excel Row, the Row height of Excel will be according to the height of the largest font in any of the cells in that Row.
Two methods for changing the Row height in Excel worksheet are explaind below.
Method 1 - How to change Row height by clicking and dragging on boundary gridline
To change the Row height of a single Row by clicking and dragging on Row boundary gridline, follow these steps.
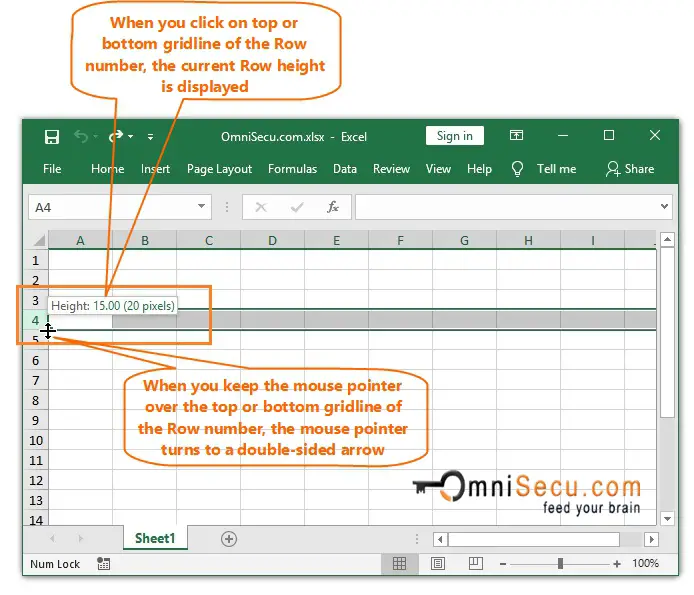
Step 1 - Select the Row you want to change its height by clicking on Row number. Place the mouse pointer on top or bottom gridline of the Row number until the mouse pointer turns to a double-sided arrow. You need to place the mouse pointer on top or bottom gridline depending on to top or bottom direction you want to change the Row height. In this example, Row number 4 and bottom gridline are selected.
Now click on the bottom gridline of Row number, as shown below.
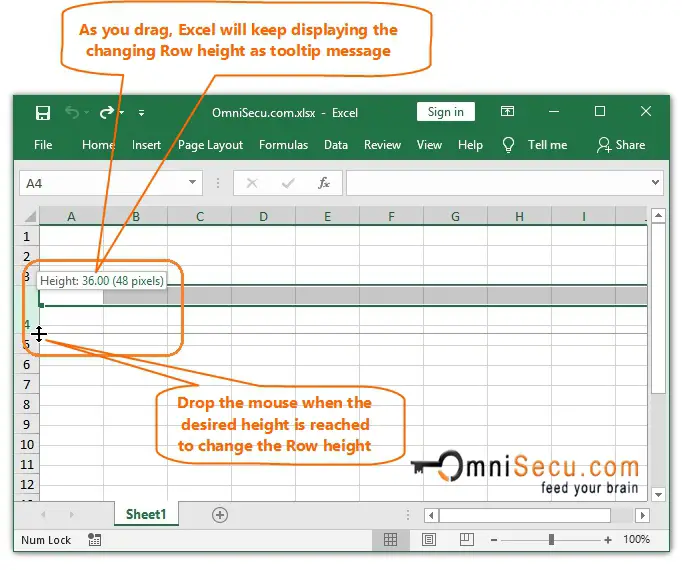
Step 2 - Drag the mouse till the desired height is reached and then drop the mouse to change the Row height. As you drag, Excel will keep displaying the changing Row height as tooltip message.
An animation about how to change the Row height of a single Row by drag and drop is copied below.
.
Similarly, you can change the height of multiple Rows simultaneously by click, drag and drop. Select multiple Rows and then click, drag and drop on top-most or bottom-most gridline of the Rows selection for changing the height of multiple Rows simultaneously.
An animation about how to change the Row height of multiple Rows by drag and drop is copied below
Method 2 - How to change Row height by entering the exact Row height value
Sometimes it is difficult to select the exact Row height by using drag and drop method described above, because the Row height value keep changing as you drag. Follow below steps to change single Row height by entering the exact Row height value.
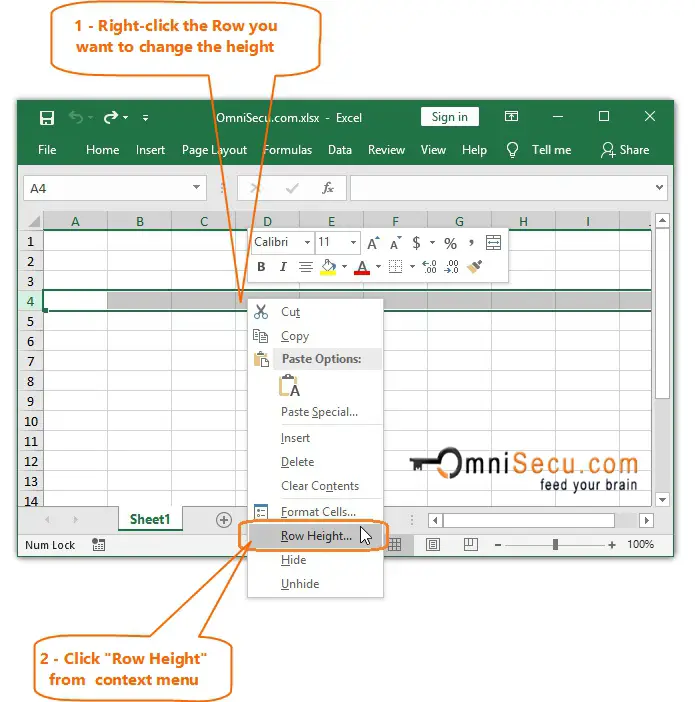
Step 1 - Right-click the Row you want to change the height and click the "Row Height" to open "Row Height" dialog box from the context menu, as shown in below image.
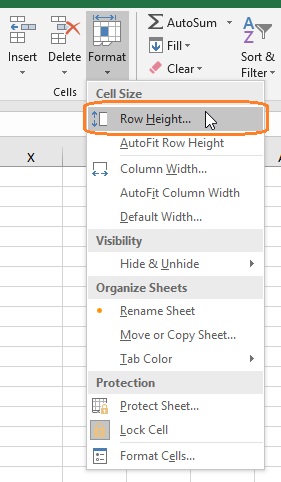
You can open the "Row Height" dialog box also from Excel Ribbon > "Home" Tab > "Cells" > "Format" as shown below.
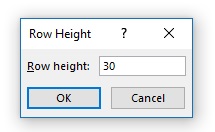
Step 2 - Enter exact value for Row height in Row height dialog box and click "OK" to change the Row height, as shown below.
Similarly, you can change the height of multiple Rows simultaneously by typing-in the Row height value. Select multiple Rows and then right-click on any Row in the selection. Click the "Row Height" from the context menu and type the Row height value in dialog box. Click "OK" button.