How to install TELNET server in Windows Server using PowerShell
It is possible to install Roles and Features in Windows Server using PowerShell. This tutorial lesson explains how to install TELNET server in Windows Server 2012, using Windows PowerShell. TELNET protocol has security related issues and TELNET server is not available in latest Windows Server Operating Systems. So, following commands may not work in Windows 2019. Here in this lesson, I made the lab using Windows Server 2012.
I suggest you to learn below lessons, before continuing.
- What is TELNET
- TELNET modes of operation
- TELNET NVT (Network Virtual Terminal)
- IAC (Interpret as Command) in TELNET
- TELNET Commands and Options
- TELNET Negotiation
- How to start TELNET service in Windows Server
- How to install TELNET Client in Windows 10
- Why TELNET is not secure
Follow paragraphs explain how install TELNET server in Windows Server 2012 using Windows PowerShell. You should login as an Administrator to run this command successfully.
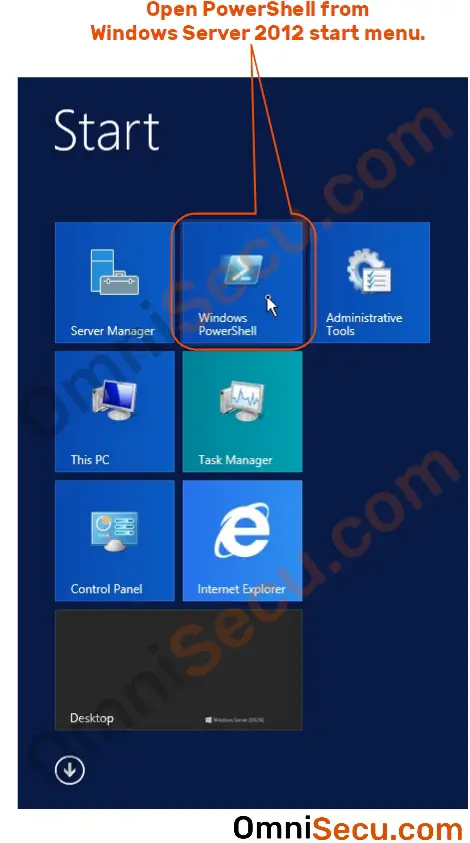
Step 1 - Open Windows PowerShell from Windows Start Menu, as shown below.
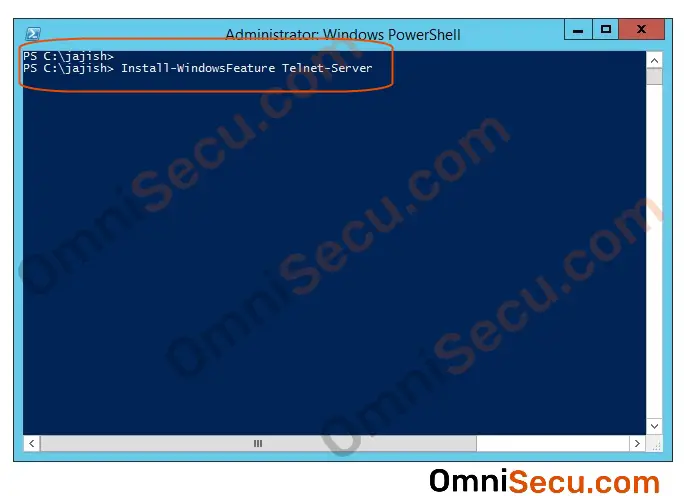
Step 2 - Run the command "Install-WindowsFeature Telnet-Server", from PowerShell prompt to install TELNET server as shown in below image.
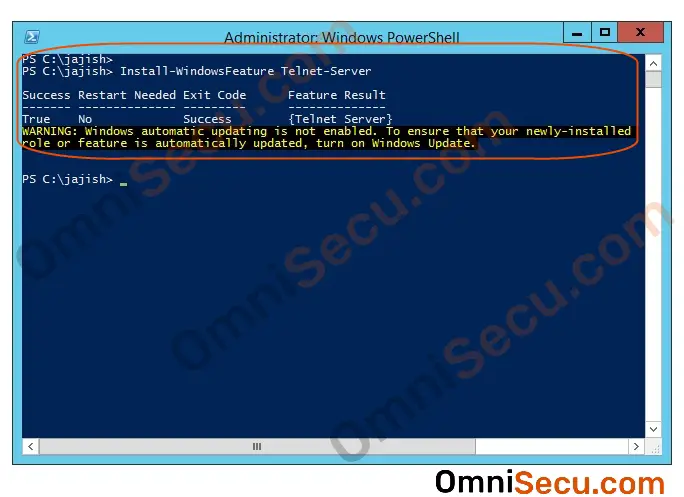
Step 3 - Once the TELNET server installation is completed, the results are shown in PowerShell prompt as shown below.
Once the TELNET server is installed, you need to start the TELNET services on Windows Server. Click the next link to learn how to start TELNET services on Windows Server, using Services MMC snap-in.