How to configure SSH port forwarding
SSH port forwarding is a technique used for transmitting network traffic belongs to an insecure protocol through a public network securely, via secure SSH tunnel. The network traffic belongs to SSH is encrypted and authenticated so that the traffic is protected from the prying eyes of malicious users in public networks.
In this lesson, we will learn how to configure and use SSH port forwarding to make TELNET traffic more secure in network transit. You may use SSH port forwarding, similar to this exercise, for making the network traffic secure for any other insecure protocol. For example, HTTP.
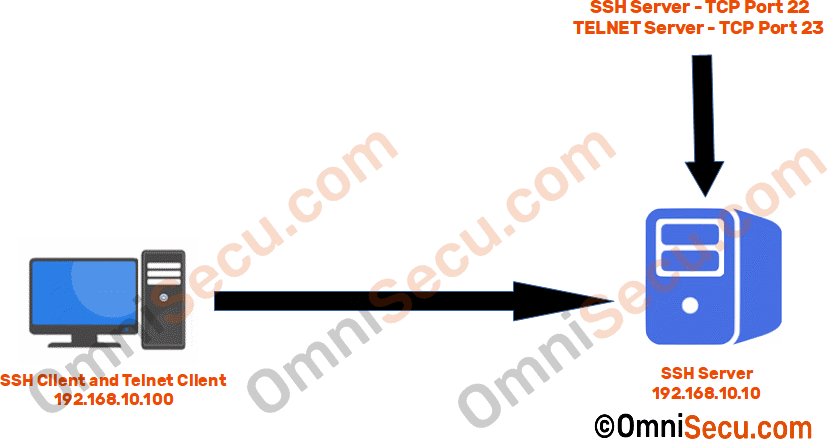
Please refer below two images image.
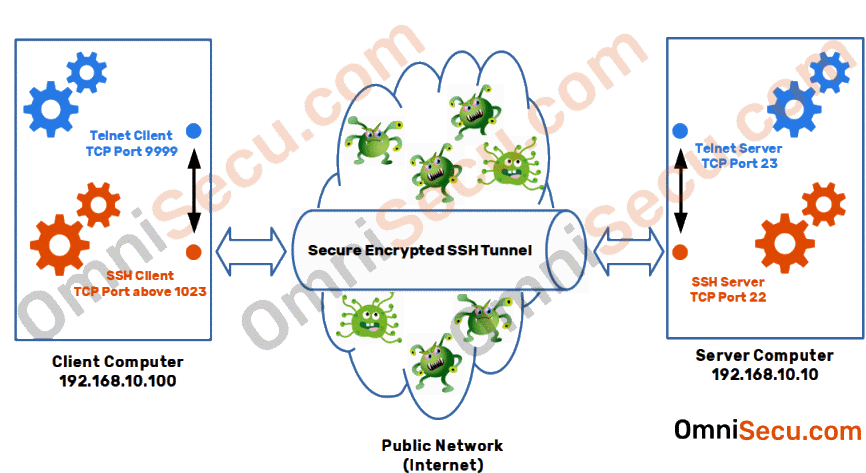
In this example, SSH client listens at TCP port number 9999 for TELNET connections, at Client Computer. You may use any other port number if you wish, but try to avoid using well-known ports.
Also, note that we are using OpenSSH Server implementation on Windows Server 2019 and OpenSSH Client implementation on Windows 10. This syntax used here is applicable to other Unix/Linux OpenSSH software portings.
To demonstrate how to configure SSH port forwarding, in this lesson we are using SSH local port forwarding.
How to configure and use SSH port forwarding
Make sure to install TELNET Server & SSH Server on Windows Server 2019 and TELNET Client & SSH client on Windows 10 computer. Start TELNET Server and SSH Server Services on Windows Server 2019. There are previous lessons available, explaining how to install OpenSSH server on Windows Server and how to install OpenSSH client on Windows 10.
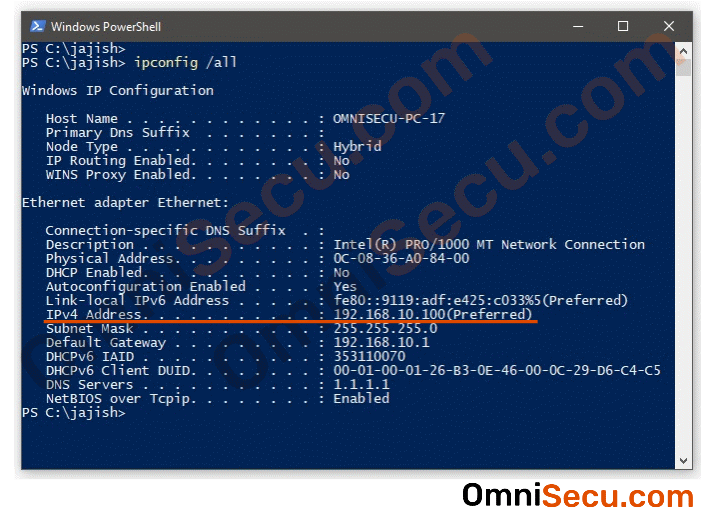
Step 1 - Open PowerShell and type "ipconfig /all" command to check whether the TCP/IP setting are correct in your local computer.
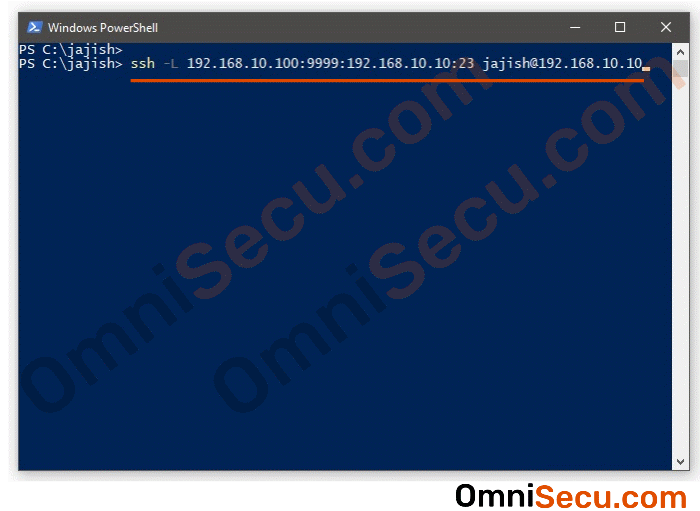
Step 2 - Type the following command at Windows PowerShell.
ssh -L 192.168.10.100:9999:192.168.10.10:23 jajish@192.168.10.10
PowerShell screenshot of above "ssh" client command for local SSH port forwarding is shown below.
Above "ssh" client command for local SSH port forwarding is explained in detail below.
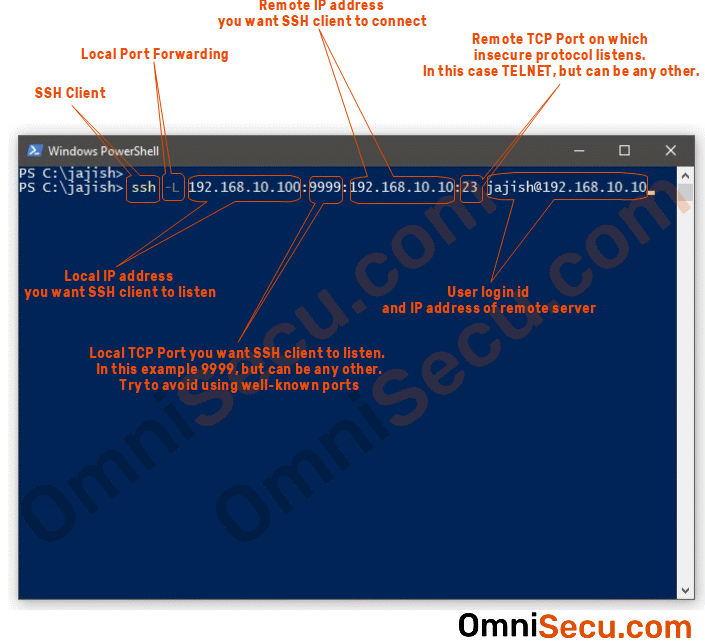
Please note that you need a valid user login id and corresponding password at Server for "ssh" client port forwarding command to work. Please refer the first and second images in this lesson to understand the topology of this SSH port forwarding exercise, IPv4 addresses of SSH client, SSH server and the related TCP port numbers.
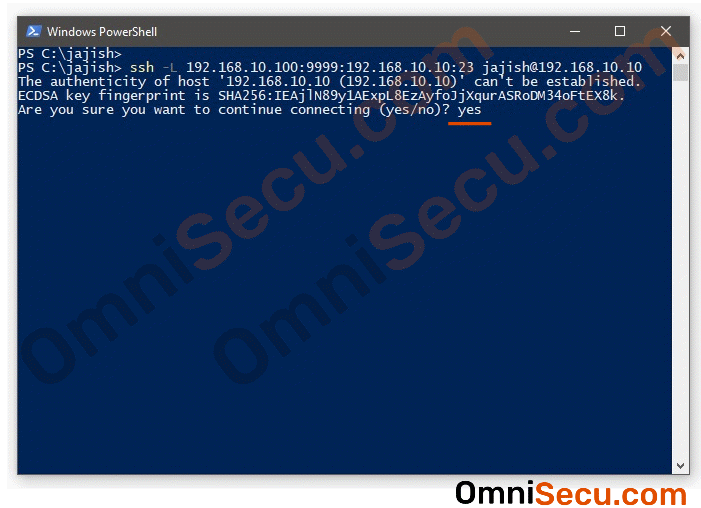
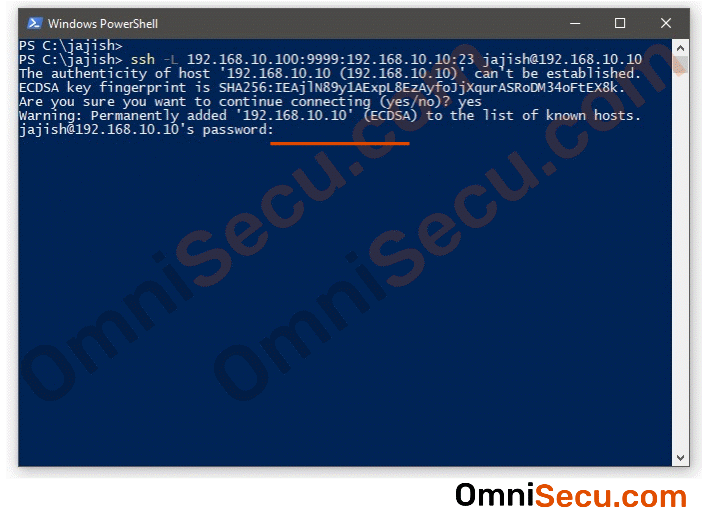
Step 3 - If you are connecting to the remote server for the first time, SSH client will display a warning message that the authenticity of the server (192.168.10.10, in this case) is not known. Type "yes", if you are sure everything is perfect, as shown below. Hit Enter key to continue.
Step 4 - Enter the password of the user at Windows Server 2019 to connect to remote SSH server. Note that the typed password is hidden at the PowerShell console.
Step 5 - Now you are connected to SSH server running at remote Windows Server 2019. You are now at the console of remote SSH Server. Your SSH port forwarding setup is ready now.
Do not close this PowerShell console, where we run the SSH port forwarding command. Keep this PowerShell window minimized.
This PowerShell window is connected to the SSH Server. Remember NOT to use this PowerShell console window to run any command related to the client computer. You will see the console output of the server and not the client in this PowerShell window.
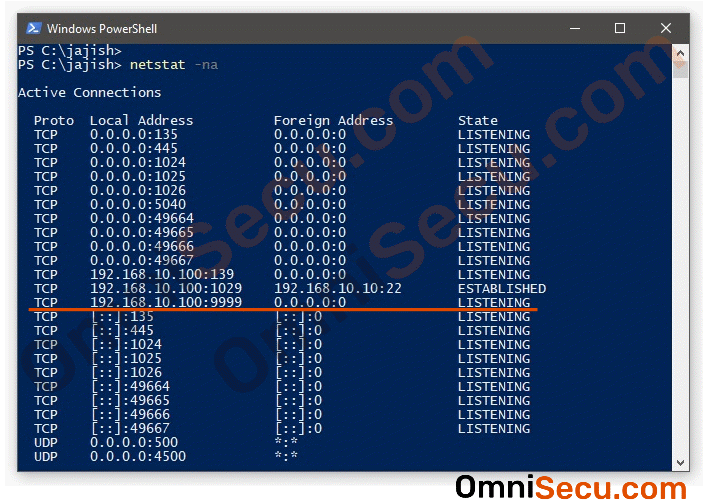
Step 6 - Open another PowerShell console window and run the "netstat" command, as shown below, to check whether SSH client is listening to the TCP port number 9999 we specified in Step 2. In this example, we are using TCP port number 9999, for SSH client to listen for SSH port forwarding.
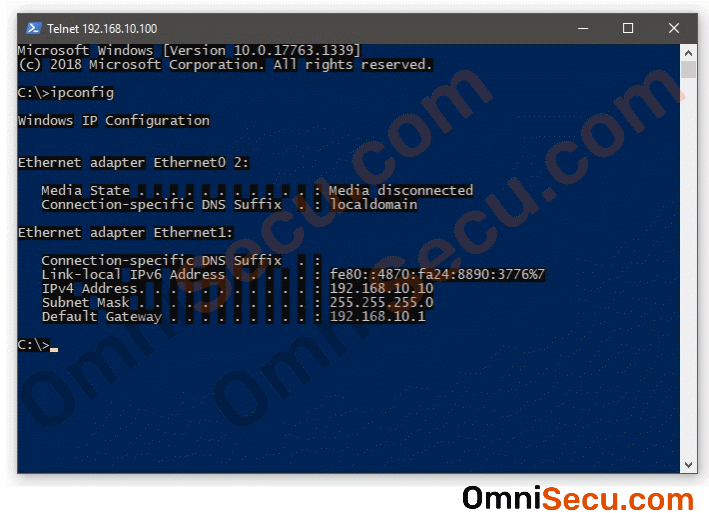
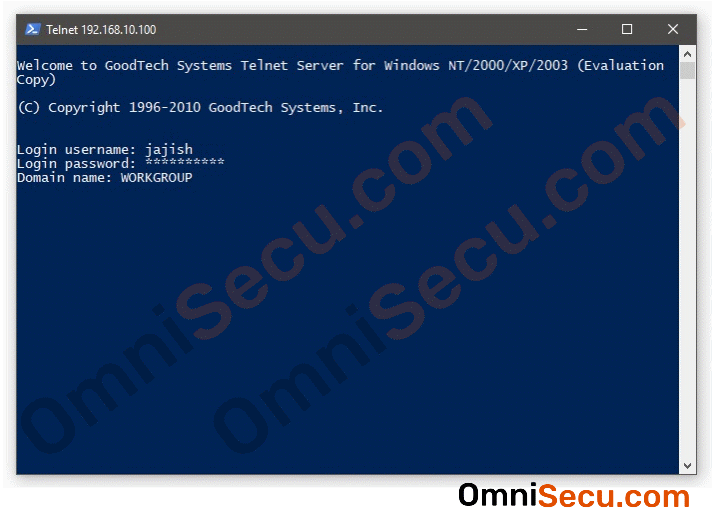
Step 7 - Type "telnet" command as shown in below image to start using the SSH secure port forwarding. Note that we are NOT specifying the IPv4 address and TCP port number for TELNET at remote Server.
192.168.10.100 is the IPv4 address of the local SSH Client and 9999 is the port number where local SSH Client listens for port forwarding. At this stage, if you are confused, go back to Step 2 and refer the SSH client command, used for port forwarding.

Step 8 - Enter the user login id and password at the remote TELNET server, as shown below. In this particular TELNET implementation, you need to provide Active Directory domain name also. If there is no Active Directory installed at Windows Server, enter Windows workgroup name at the Server.
Step 9 - Now your TELNET client is authenticated to the remote server, in a secure way, using SSH port forwarding tunnel. All the future network traffic between the TELNET client and TELNET server will be authenticated and encrypted, inside SSH tunnel.
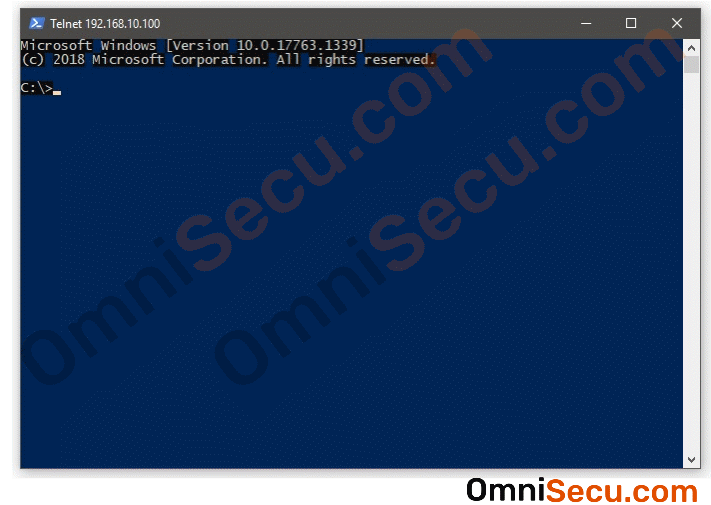
Step 10 - Run a command at the TELNET connection console to test whether everything is working perfect.