How to create and add a Custom Tab in Excel Ribbon
To create a custom Tab inside Excel Ribbon, follow these steps.
Step 1 - Right-click anywhere on Excel Ribbon and then select "Customize the Ribbon", as shown in below image.
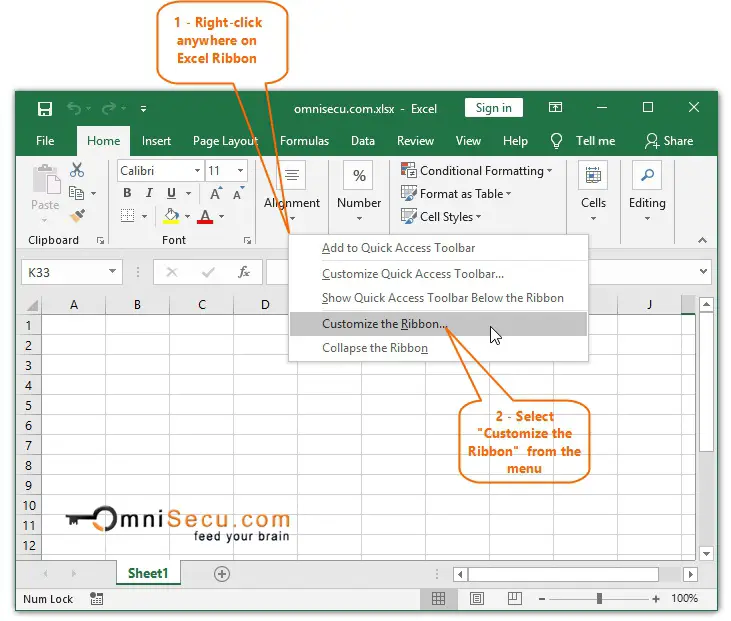
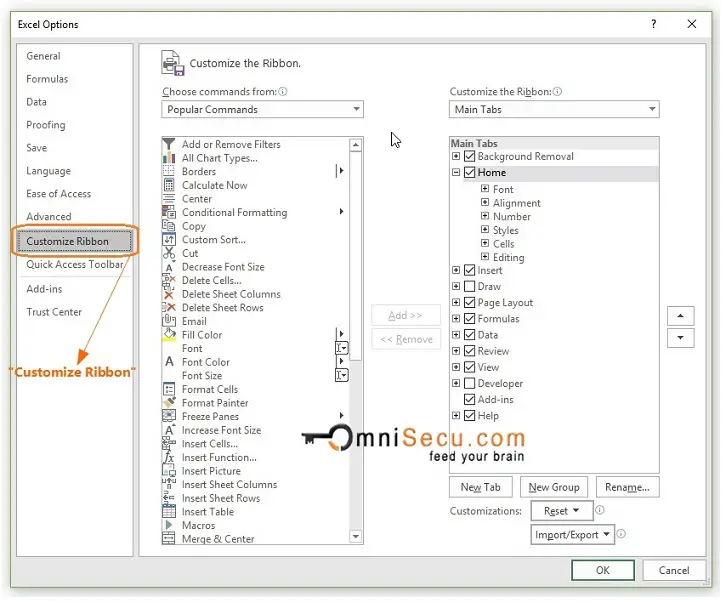
"Excel Options" window is opened and its "Customize Ribbon" Panel is displayed as shown below.
Tip
"Excel Options" window to customize Excel Ribbon can be opened by following methods also.
• Click the "File" tab in Excel Ribbon and then click "Options". Select "Customize Ribbon" Panel.
Or
• Right-click anywhere on the "Quick Access Toolbar" (except on "Customize Quick Access Toolbar" drop-down button). Click "Customize Ribbon".
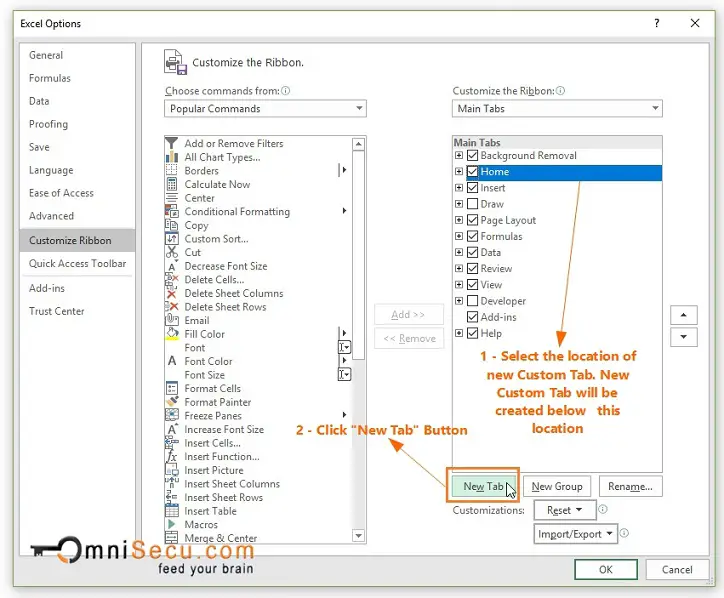
Step 2 - Select the location of new Custom Tab in right-side list. New Custom Tab will be created below this location. Note that top-most Tab in right-side list corresponds to the left-most Tab in Excel Ribbon. Here in this case, I had selected "Home" Tab. New custom Tab will be created below "Home" Tab.
Click "New Tab", as shown in below image.
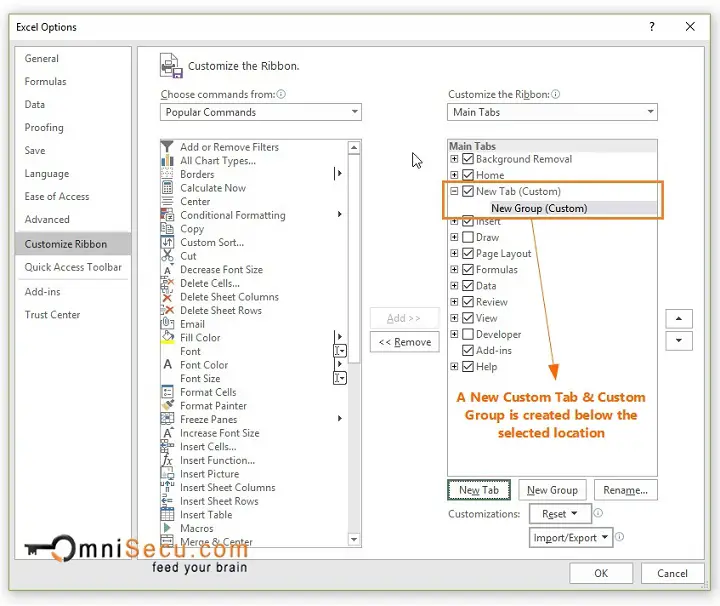
Step 3 - A new Custom Tab is created just below the inbuilt Tab "Home". Excel Commands can be added only to a Group. A Custom Group is also created automatically inside the new Custom Tab, as shown in below image.
Since the new Custom Tab is just below the "Home" tab in right-side list, it will appear on right next to "Home" Tab inside actual Excel Ribbon.
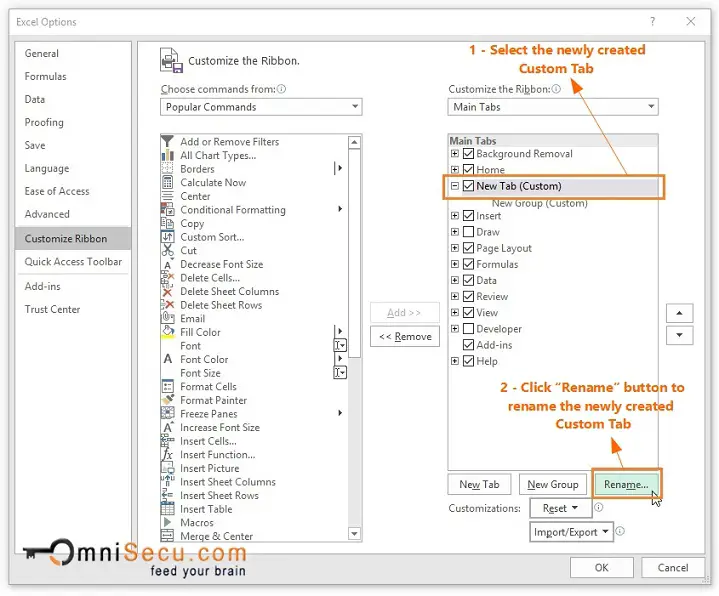
Step 4 - To rename the newly created custom Tab from its default name to any meaningful name, select the Tab and then click "Rename" button as shown in below image.
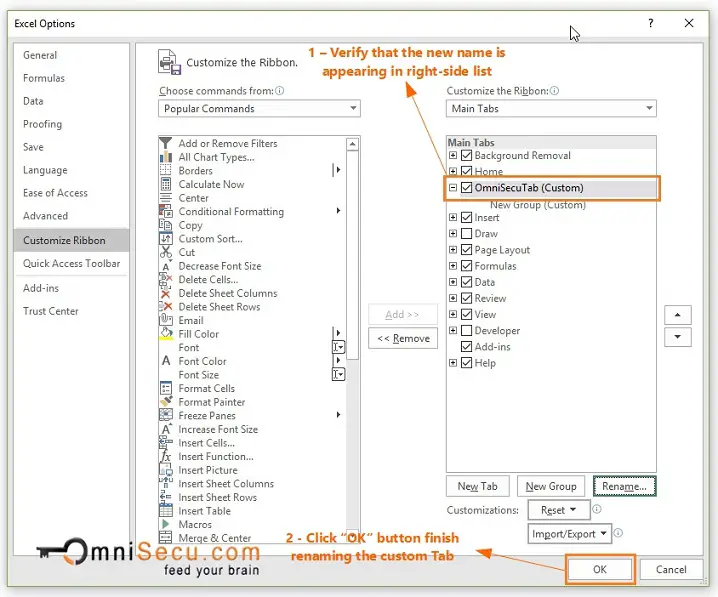
Step 6 - Verify that the newly entered name i for Custom Tabs apperaing on right-side list in "Excel Options" window's "Customize Ribbon" panel. Even though the Tab name is renamed, the word "(Custom)" continues to appear with the new Tab name in the right-side list . The word "(Custom)" in your Tab name helps to quickly identify between inbuilt Tabs and user created Custom Tabs.
Click "OK" button finish renaming the custom Tab, as shown in below image.
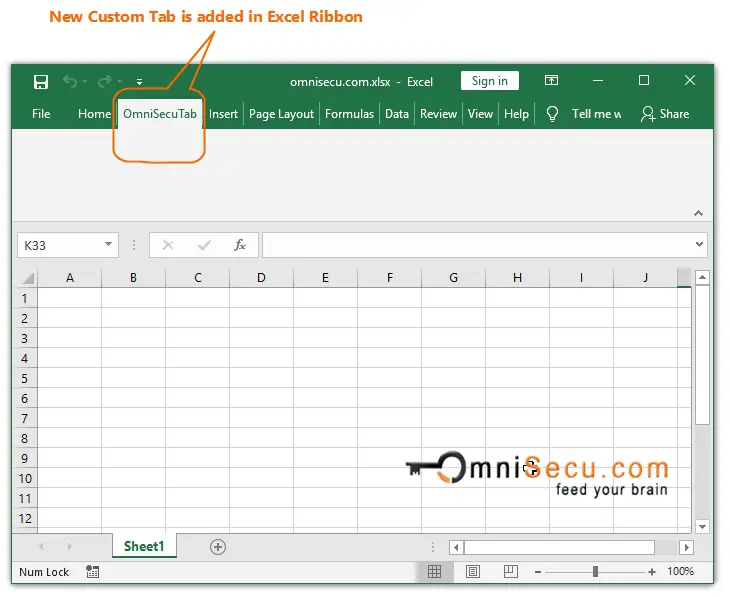
Step 7 - Verify that the newly created Custom Tab is appearing in Excel Ribbon, as shown in below image. The new Custom Tab is empty because no Excel command is added in it. Eventhough a Group was automatically created, it will not showup untill commands are added to it.
Click the following links to learn